Brightidea gives Admins the option to create a more personalized experience with inviting users into your Initiative. Admins can send registration emails to a certain amount of users to promote engagement within your Initiative.
Sending the Invitation
To get started with Registration invites, navigate to Site Setup > Users > Registration Invites and select Create New Registration Email
Admins will then be prompted to complete additional fields in their registration invitation. The information required for each email is follows:
- Subject: Title of the email.
- Send To: Registration Invitation recipients. Admins can enter the User's email(s). Alternatively, Admins can Import Users—more information below on this option.
- Group: The user Group applied to the invited users once they register. Only groups assigned to the Pipeline will appear in this list.
- Body: Content of the email.
- Footer: The bottom of the invitation email will automatically include the following text: "Follow this link to complete registration: ". This text can be modified by enabling the Label Editor.
When an Admin has completed filling out the registration email, they will then select Send Invites". This will confirm the list of Users that were sent invites, in which the Admin will have the option to press "Done". They will then be prompted back to the Registration Invite creation screen, but this time with the latest invite showing.
Admins will then see that each of their Registration Invites have three options to organize through:
- "Delete" will delete the Registration Invite so that the invite can not be used again. Any invites that have been sent out can still be accessed by the receiver.
- "Recipients" will display two lists, Registered and Not-Registered, of the Users that have received the invite. Registered Users are the ones that have clicked into the link and created an account, while Not-Registered are the ones who have not created an account.
- Within the Not-Registered list, Admins can click into a User and Resend the invite if needed.
- "View" will bring up the registration invite that was sent, display a timestamp of when it was sent and the list of Users it was sent to.
Note: Admins can also refer to the User Activity and Login History reports to review further information on User's last login date.
Bulk Uploading for Invite
In the instance where Admins want to invite more than 5 people, they will need to "Import Users" into Brightidea to send the Registration Invite. To do this, they must select the "Import Users" button after they fill out all Registration Invite information.
Admins will then be shown the Import Users prompt below:
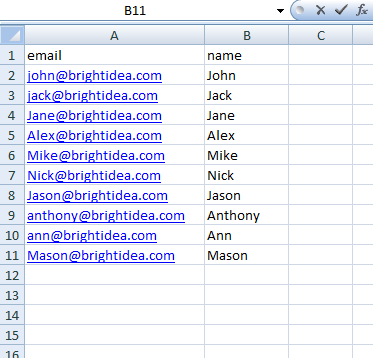
The 'download sample' option at the top will provide an example of the template Admins need to follow to import Users. The template will be composed of two columns, column A and B, with Row 1 dedicated to 'email' and 'name'. Refer to the example below.
Once the template is saved, it can be imported into Brightidea by selecting "Choose File" and then "Upload Users". The importer will put all Users from the list into the left-side box, in which the Admin will move any or all Users to the right-side to receive the Registration Invite.
Select "Send Invites" when finished!
Additional Notes
- There is no email template for Registration invites - it must be built manually.
- Admins that send a Registration Invitation to a Registered User will not be received.
- Admins can set an expiration date for invitations within the Site Setup > Access > Security tab of the Initiative.
- Registration Invites are only available at the Initiative level.
- This email needs to be turned on for self-registration to be successful.
Comments