Before you attempt to update your SSO Certificate, please enable our standardBrightidea Loginto ensure that you are not locked out of your Brightidea site!
We strongly recommend downloading the existing certificate as a backup in the event it needs to be re-uploaded, ie, if the new certificate doesn't work or is not live yet.
Please also note the date when your SSO certificate is set to expire, as you will be locked out of your Brightidea site if it expires and Brightidea Login is not enabled.
Getting Started
To update the SSO certificate for your Brightidea site, navigate to System Setup > Access > SAML Profiles and locate the associated SSO profile.
As a first step, remove the existing certificate by clicking the "x" icon. Select Save Changes and refresh the page.
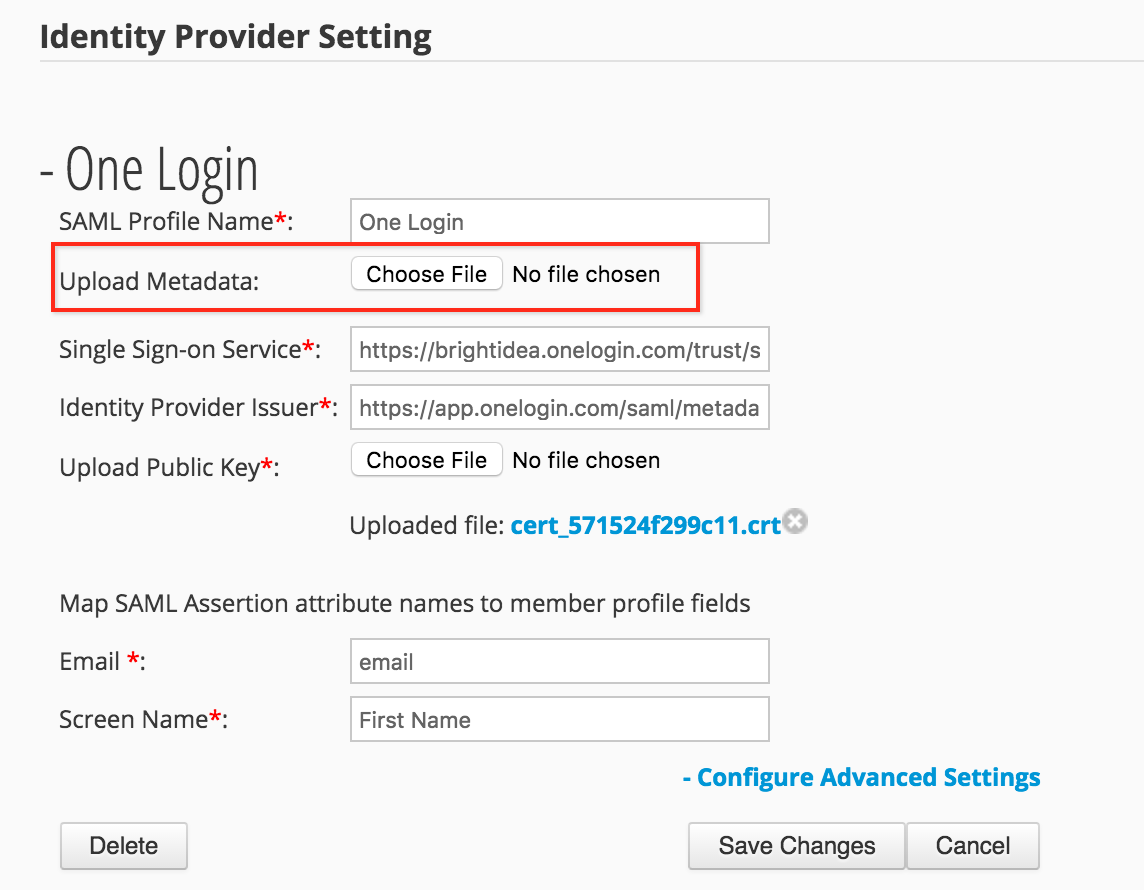
Re-upload Metadata
You can re-upload metadata in order to update your SSO Certificate
This field expects a certificate used for signature verification in a SAML Response. It can be auto-populated through Metadata upload.
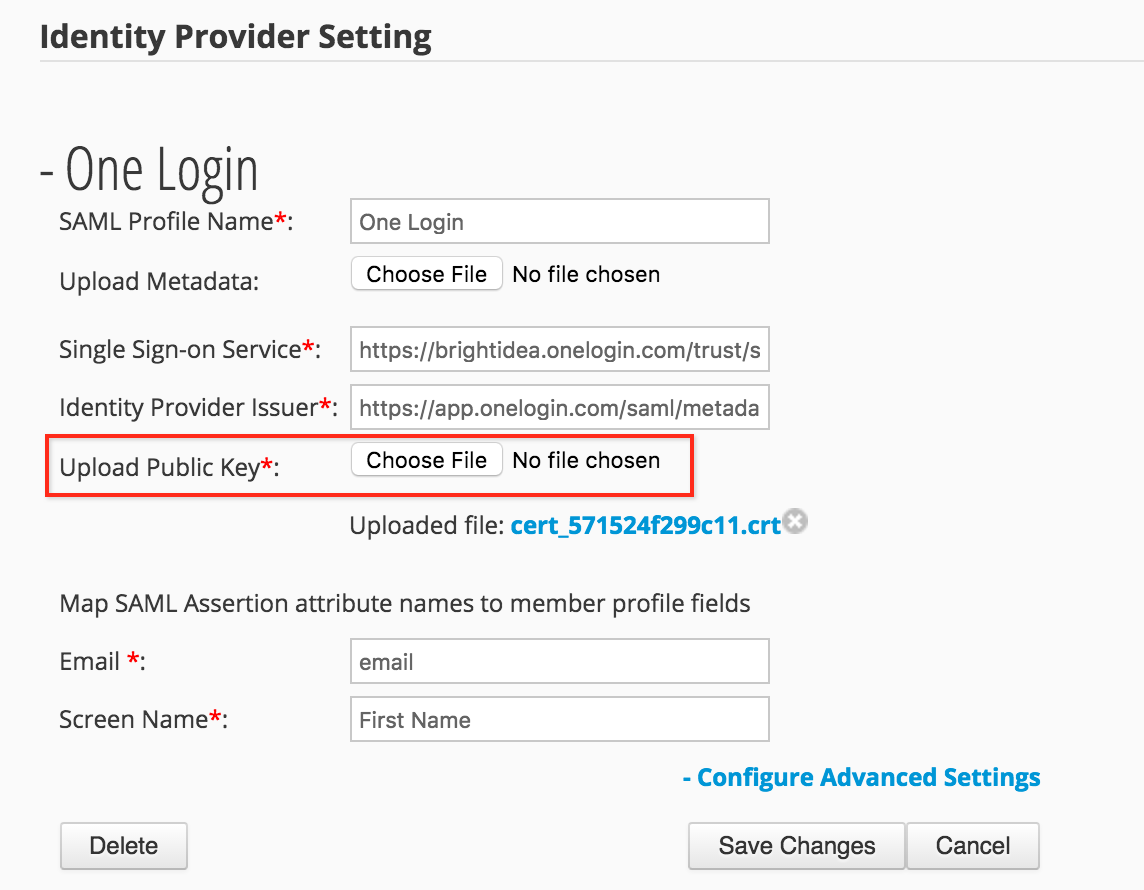
Re-Upload Public Key
If you do not want to re-upload the entire Metadata, you can directly re-upload your public key, which will update your SSO certificate.
Make sure to select Save Changes and test the SSO connection to ensure it works properly with the new certificate.
Additionally, after uploading the new certificate, please verify that the 'Site authentication' setting under 'Configure Advanced Settings' remains set correctly according to your SSO requirements.
Only after ensuring SSO works without issues, can you disable the standard Brightidea login option that was enabled above.
For more information on our SSO configuration, please see our complete SSO feature guide here!
Comments